- Clerk.io Help Center
- Using Clerk.io on Shopware 6
- Data Management
-
Working with Clerk.io
-
Using Clerk.io on Other / Custom Platforms
-
Using Clerk.io on Shopify
-
Using Clerk.io on Magento 1
-
Using Clerk.io on Magento 2
-
Using Clerk.io on WooCommerce
-
Using Clerk.io on Prestashop
-
Using Clerk.io on BigCommerce
-
Using Clerk.io on Shoporama
-
Using Clerk.io on Shopware 6
-
Using Clerk.io on DanDomain
-
Using Clerk.io on Lightspeed
-
Using Clerk.io on SmartWeb / HostedShop
-
Using Clerk.io on DynamicWeb
-
Using Clerk.io with Any Email Client
-
Using Clerk.io with Copernica
-
Using Clerk.io with Autopilot
-
Using Clerk.io with Active Campaign
-
Using Clerk.io with Marketing Platform
-
Using Clerk.io with MailChimp
-
Using Clerk.io with MailUp
-
Using Clerk.io with Apsis
-
Using Clerk.io with UbiVox
-
Using Clerk.io with CleverReach
-
Using Clerk.io with Google Ads
-
Using Clerk.io with Act-On
-
Audience Integrations with Facebook
-
Using Clerk.io with DotDigital
-
Using Clerk.io with Klaviyo
Customising Product Data Using Shopware 6
Add custom attributes to your Clerk.io data from Shopware 6
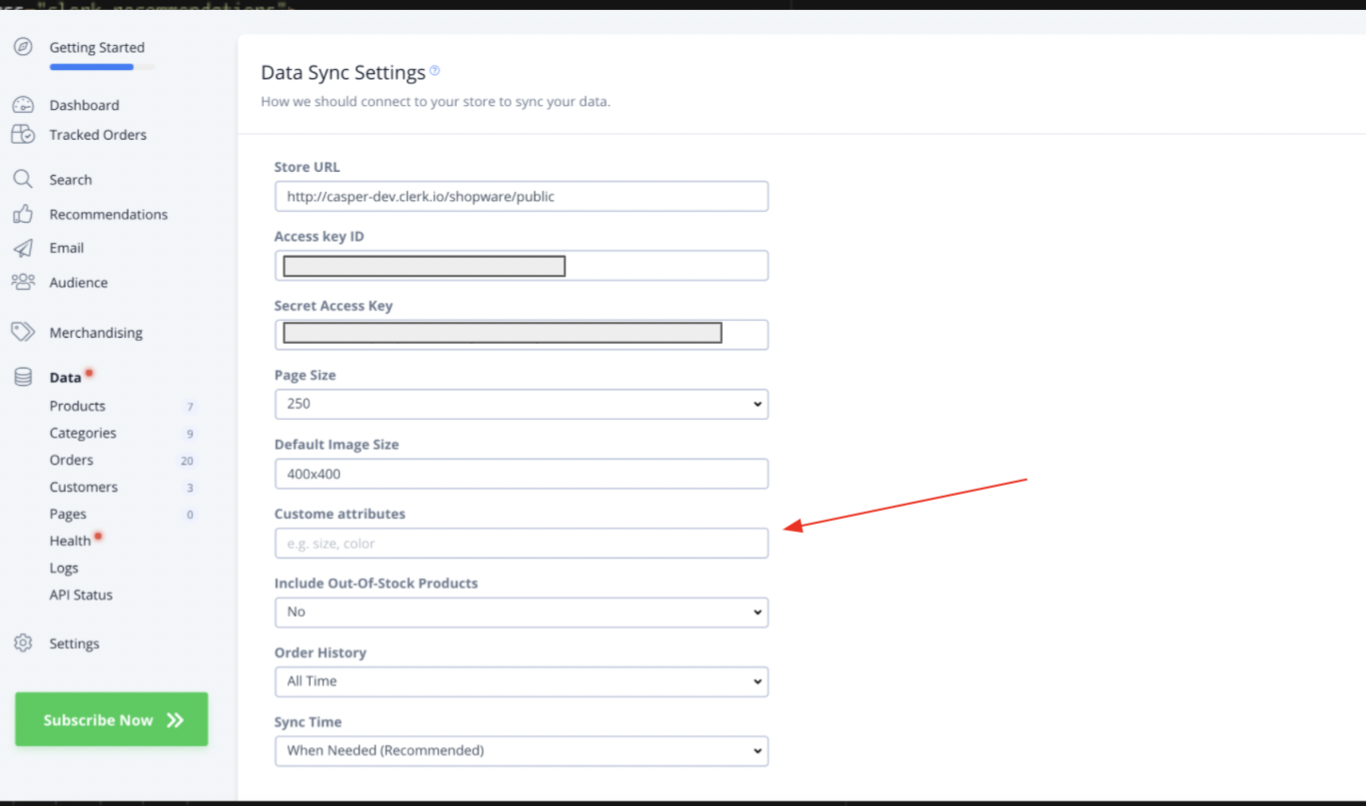
In my.clerk.io, choose Data > Data Sync Settings, and scroll down to "Custom Attributes"
If you have custom product attributes you'd like to include in your data, type in the attribute value names in the text box below Custom Attributes.
Remember to add these as comma-separate values:
Once these custom data values are added, you'll be able to use these product attributes in your Clerk.io Designs and Content.
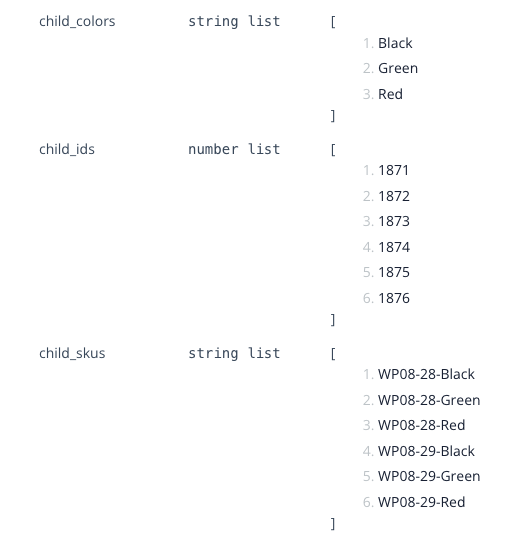
If the attributes you want to send are already available as part of your configurable/grouped products data in your Shopware admin, they can easily be synced on the latest version of your plug-in. They will appear as child_attribute, for example, child_color, child_skus etc.