-
Working with Clerk.io
-
Using Clerk.io on Other / Custom Platforms
-
Using Clerk.io on Shopify
-
Using Clerk.io on Magento 1
-
Using Clerk.io on Magento 2
-
Using Clerk.io on WooCommerce
-
Using Clerk.io on Prestashop
-
Using Clerk.io on BigCommerce
-
Using Clerk.io on Shoporama
-
Using Clerk.io on Shopware 6
-
Using Clerk.io on DanDomain
-
Using Clerk.io on Lightspeed
-
Using Clerk.io on SmartWeb / HostedShop
-
Using Clerk.io on DynamicWeb
-
Using Clerk.io with Any Email Client
-
Using Clerk.io with Copernica
-
Using Clerk.io with Autopilot
-
Using Clerk.io with Active Campaign
-
Using Clerk.io with Marketing Platform
-
Using Clerk.io with MailChimp
-
Using Clerk.io with MailUp
-
Using Clerk.io with Apsis
-
Using Clerk.io with UbiVox
-
Using Clerk.io with CleverReach
-
Using Clerk.io with Google Ads
-
Using Clerk.io with Act-On
-
Audience Integrations with Facebook
-
Using Clerk.io with DotDigital
-
Using Clerk.io with Klaviyo
How to Set Up an Audience Exporter Using Facebook
Getting started with integrating Clerk.io Audience Exporter with Facebook Ads.
To get started with setting up a Facebook Audience Exporter, head over to your my.clerk.io backend, select "Audience" from the left-side menu, then choose "Integrations" just below.
-
Click "New Exporter" on the right side to create the new integration.

-
Then, in the pop-up, select "Facebook" for the Platform, and give the integration a custom name.

-
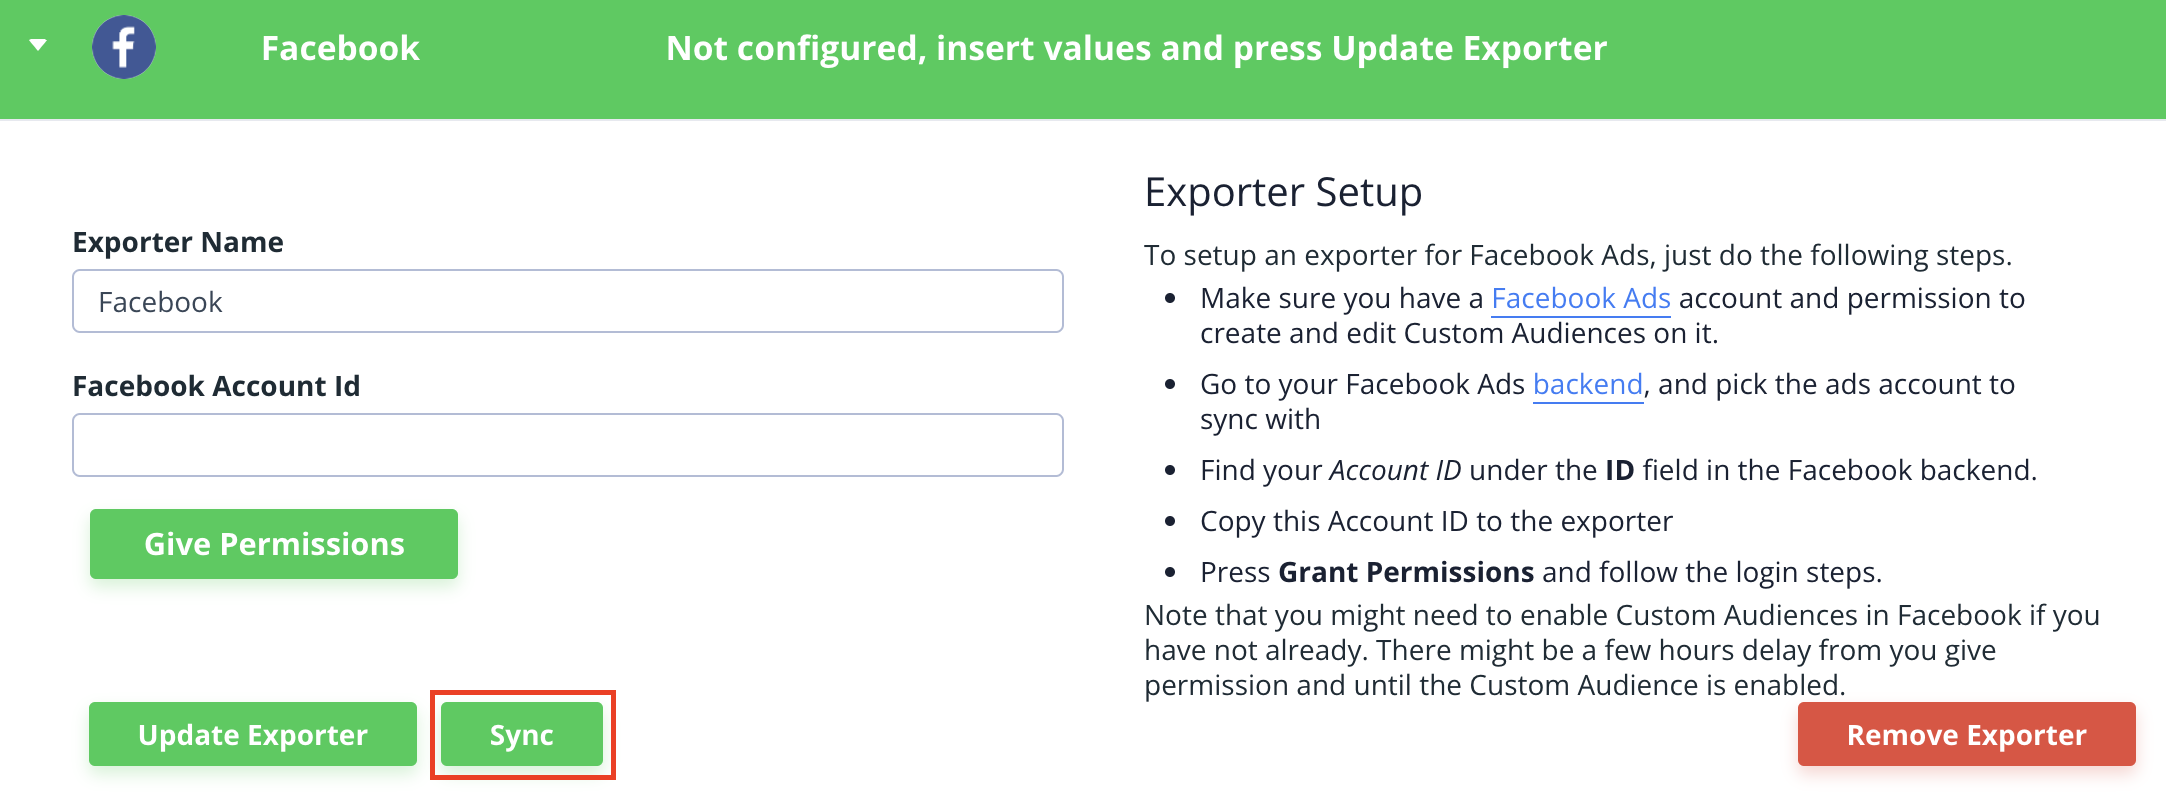
Provide your Facebook Ads Account ID, and click "Give Permissions", then follow the login steps.
-
Double-check that you have Custom Audiences enabled in Facebook to make sure the Clerk.io integration can sync
-
-
Click "Update Exporter" to update, then "Sync" to integrate.
Did this answer your question?